

CNC Machining an Aluminum Electronics Enclosure from Solid 6061
A custom audio electronics enclosure CNC machined from a single block of 6061 aluminum. The internal cavity and connector openings were machined before fine sandblasting, anodizing and laser marking completed the finished housing.
- Industry
- Audio & Electronics
- Material
- Aluminum 6061
- Process
- CNC Milling from Solid Billet
- Production
- Batch Manufacturing
- Surface Finish
- Fine Sandblasting + Anodizing
- Final Process
- Laser Marking
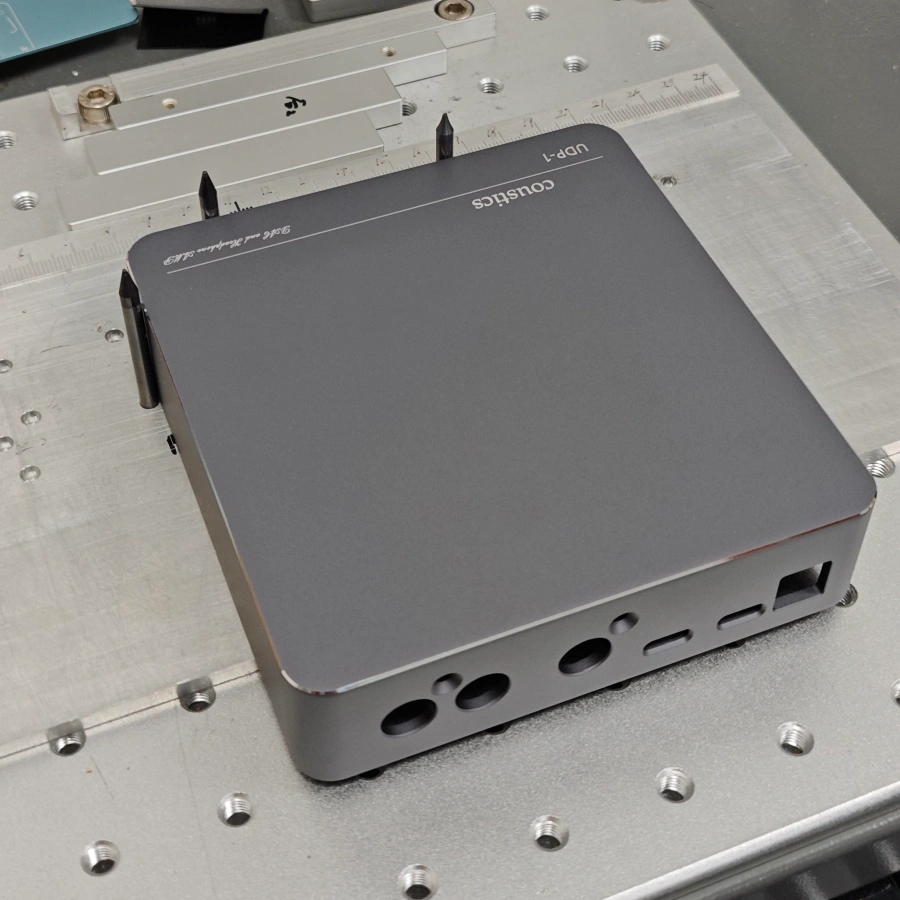
Maintain dimensional stability after large-volume cavity machining while achieving a uniform cosmetic finish across the production batch.
Key Engineering Challenges
This audio electronics enclosure was CNC machined from solid 6061 aluminum. Creating the internal cavity and connector openings was only part of the project: the housing also needed to retain its geometry and achieve a consistent appearance after fine sandblasting, anodizing and laser marking.
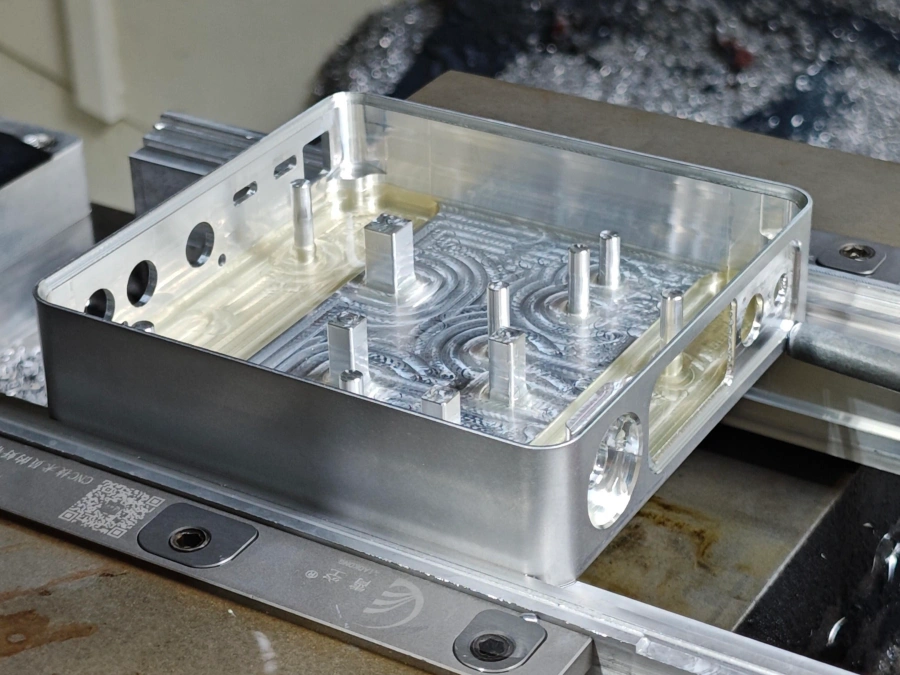
Large-Volume Material Removal
Creating the large internal cavity required removing a substantial amount of aluminum from the solid billet. The key challenge was limiting distortion while maintaining the enclosure walls and mating surfaces for subsequent assembly.
Multi-Side Features & Connector Alignment
Openings on different faces needed to align with the internal electronics and mounting features. Consistent machining references and repeatable positioning were important to preserve these relationships across multiple setups.
Cosmetic Finish & Surface Protection
The housing forms the visible exterior of the audio product. Scratches, handling marks and uneven surface preparation could affect its final appearance. Visible surfaces therefore required careful handling through machining, finishing and laser marking.
From Solid Billet to a Finished Audio Enclosure
The manufacturing approach brings cavity machining, multi-side features and cosmetic finishing into one coordinated workflow. Each stage has a clear purpose: establish the housing geometry, maintain assembly relationships and prepare the surfaces for the final finish.
Start from Solid 6061 Aluminum
Machine the main housing from a single aluminum billet, creating the internal cavity and external geometry within one continuous structure.
Separate Cavity Roughing from Finishing
Remove the main cavity material during roughing and retain machining allowance for finishing. This approach helps manage material movement before the walls and functional surfaces reach their final dimensions.
Finish the Housing & Mounting Features
Finish the cavity walls, mating surfaces and internal mounting features with attention to their relationship to the enclosure geometry and the customer’s assembly requirements.
Machine Openings Across Multiple Faces
Use consistent locating references when repositioning the housing for connector openings and side features. The aim is to keep the external openings aligned with the internal assembly layout.
Prepare for Cosmetic Surface Finishing
Deburr edges and protect visible surfaces before fine sandblasting and anodizing. Complete laser marking after anodizing to create the final product graphics and connector labels.
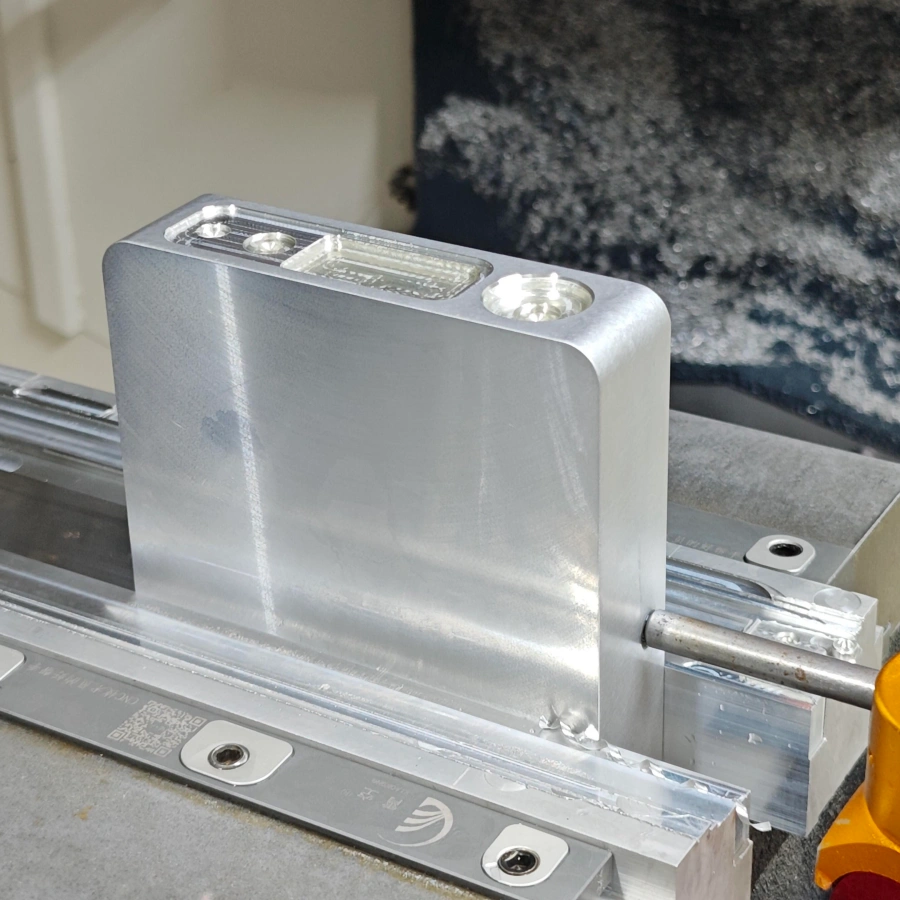
Cosmetic quality begins before surface treatment. Controlled machining, careful deburring and protected handling provide the foundation for a consistent matte finish and clear laser markings.
From Aluminum Billet to Finished Electronics Enclosure
This project combines CNC machining with fine sandblasting, anodizing and laser marking. The six stages below show how a solid 6061 aluminum billet becomes a finished housing for audio electronics.
-
Material Preparation
6061 aluminum billets provide the starting stock for the one-piece enclosure, with machining allowance for the cavity and external surfaces.
-
CNC Cavity Machining
The internal material is removed to create space for the audio electronics while retaining the walls and structural features of the housing.
-
Geometry & Connector Features
CNC finishing produces the enclosure geometry, mounting features and connector openings on the required faces.
-
Deburring & Fine Sandblasting
Machined edges are deburred before fine sandblasting prepares the surfaces with the required matte texture.
-
Anodizing
The sandblasted housings are anodized to create the specified dark finish and improve surface corrosion resistance.
-
Laser Marking
Product graphics and connector labels are laser marked after anodizing, completing the branded enclosure.
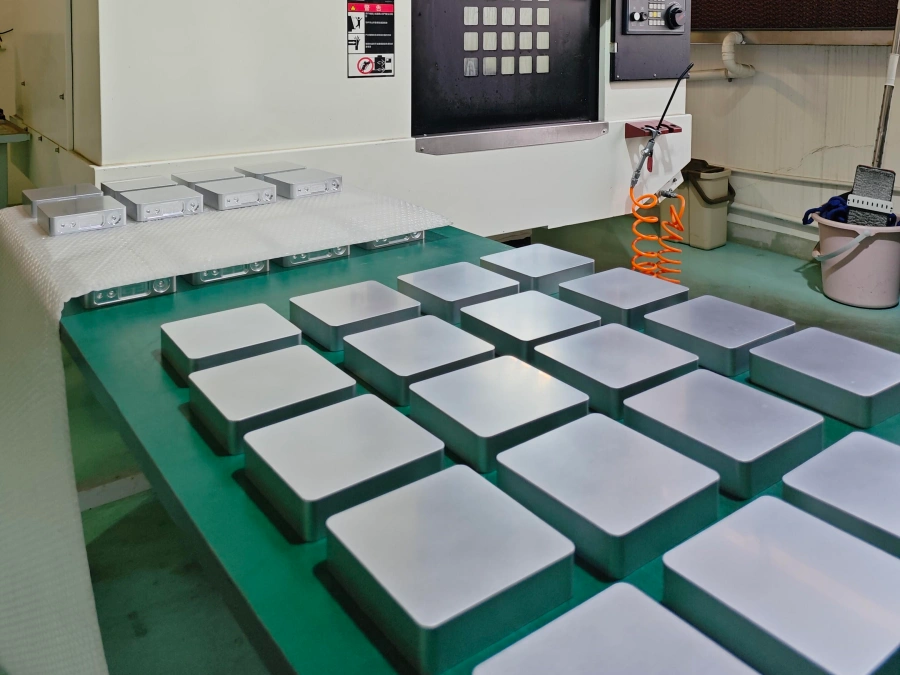
A Complete Manufacturing Route, Shown in Production
The project photos document more than the finished appearance. They show the aluminum stock, cavity machining and final laser marking, connecting the finished housings to their manufacturing process.
Manufacturing route: Solid 6061 billet → CNC machining → deburring → fine sandblasting → anodizing → laser marking.
Why Machine an Electronics Enclosure from Solid Aluminum?
A one-piece CNC machined housing combines the external enclosure and internal assembly features in a single aluminum body. For premium audio electronics, this approach offers useful advantages in structure, connector positioning, appearance and design flexibility.
Rigid One-Piece Structure
The main housing is machined from one billet, with no welded corners or joints between its exterior walls. The resulting structure can provide a stable foundation for internal electronics and mounting features, depending on the wall geometry and design.
Integrated Assembly Features
Connector openings, mounting holes and internal locating features can be machined directly into the housing. CNC machining allows these features to follow the CAD model and drawing requirements for the customer’s electronics layout.
Clean, Premium Appearance
Continuous exterior surfaces and machined edge details create a clean enclosure shape. Fine sandblasting, anodizing and laser marking complete the matte surface and product graphics shown in this project.
Flexible Design Revisions
Connector positions, cavity geometry and mounting features can be revised through CAD and CNC programming without dedicated casting dies or stamping tooling. Significant changes may still require new fixtures or a revised machining strategy.
When Is Solid-Billet Machining a Good Fit?
This route can suit prototypes and low- to medium-volume audio or electronics projects where custom geometry, assembly fit and exterior appearance justify the machining effort. Removing a large internal cavity consumes material and machine time, so production quantity, wall design and finishing requirements should be reviewed when comparing enclosure manufacturing options.
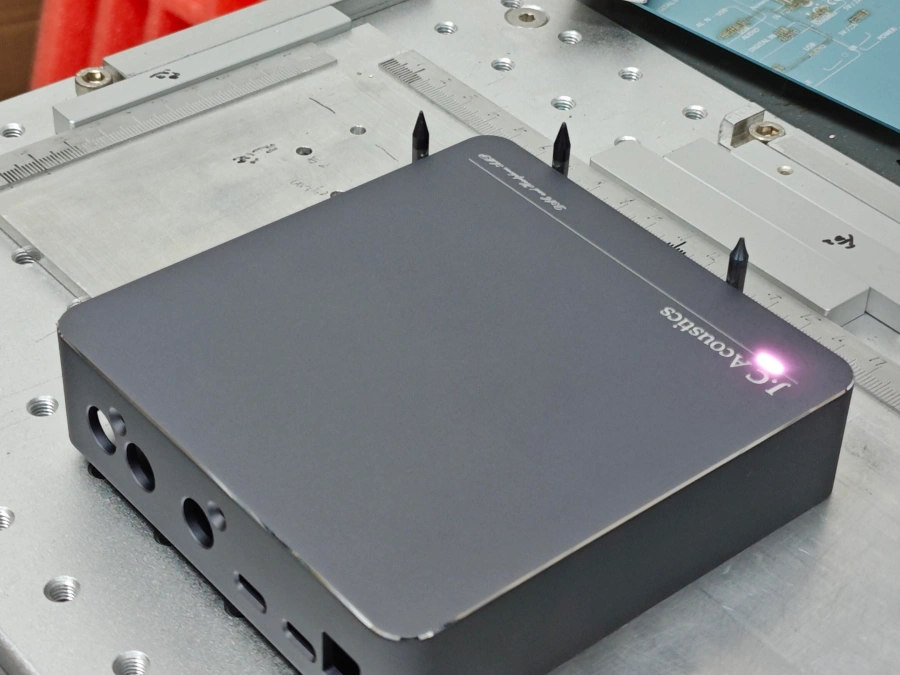
Fine Sandblasting, Anodizing & Laser Marking
The machined housing is also the visible exterior of the audio product. Fine sandblasting, anodizing and laser marking complete the enclosure with a matte texture, a dark finish and clearly defined product graphics.
-
Fine Sandblasting
Fine sandblasting prepares the machined surfaces with a uniform matte texture before anodizing. Surface preparation is important because scratches and deeper machining marks can remain visible through the final finish.
Surface goal: a fine, even matte texture -
Anodizing
Anodizing creates a protective oxide layer on the aluminum, improving corrosion resistance and providing the dark appearance specified for this enclosure. Consistent preparation helps support a consistent cosmetic result across the batch.
Surface goal: a consistent dark appearance -
Laser Marking
Product graphics and connector labels are laser marked after anodizing. The contrasting markings identify the external interfaces and complete the housing without adhesive labels or a separate printing step.
Marking goal: clear graphics and readable labels
The finish depends on the surface underneath. Sandblasting and anodizing do not reliably conceal dents or deep scratches. Careful machining, deburring and handling are therefore essential before the enclosure reaches the finishing stage.
Inspection Priorities for Assembly and Appearance
For a machined electronics enclosure, overall dimensions alone do not define quality. Internal mounting features, connector positions, mating surfaces and the visible finish all contribute to a housing that fits the customer’s assembly and presents the intended appearance.
Internal Mounting Features
Check the specified mounting holes, threads and locating features against the drawing. Their dimensions and positions affect how internal components are secured within the enclosure.
Connector Openings & Alignment
Verify opening sizes and locations relative to the specified datums and internal mounting layout. These relationships determine whether the customer’s connectors can fit through the housing as intended.
Enclosure Geometry & Mating Surfaces
Review the finished housing dimensions and any specified flatness or mating requirements after cavity machining. Particular attention belongs to surfaces that locate or join other assembly components.
Cosmetic Finish & Laser Marking
Review visible surfaces for scratches, dents and finish variation after anodizing. Check laser graphics for their position, clarity and agreement with the approved marking artwork.
Inspection principle: Assess functional features against the drawing and agreed tolerances. Assess visible surfaces and laser markings against the agreed cosmetic requirements and approved artwork, with a reference finish sample where specified.
Final Aluminum Enclosures and Manufacturing Details
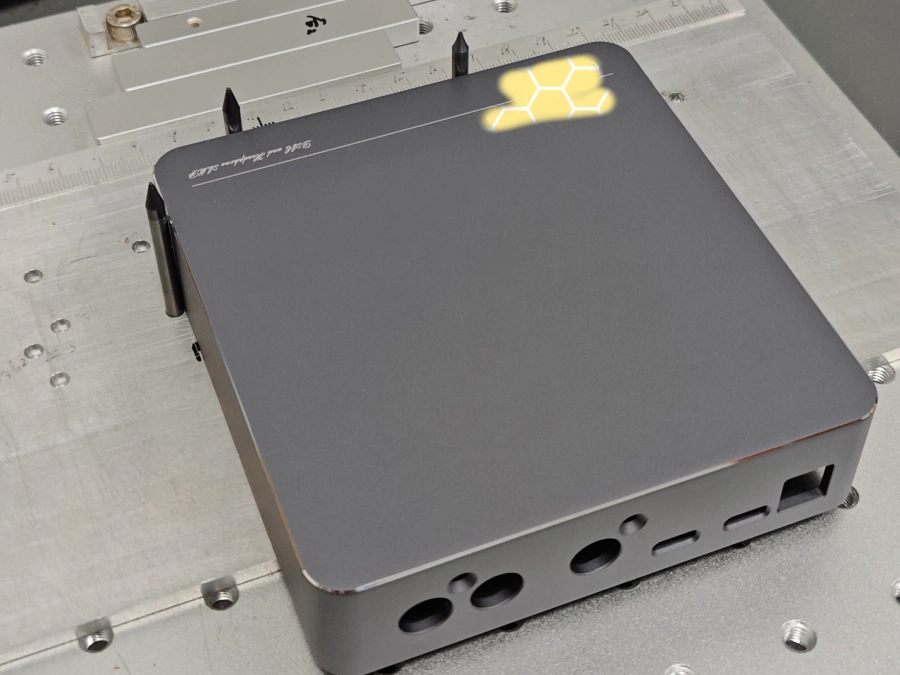
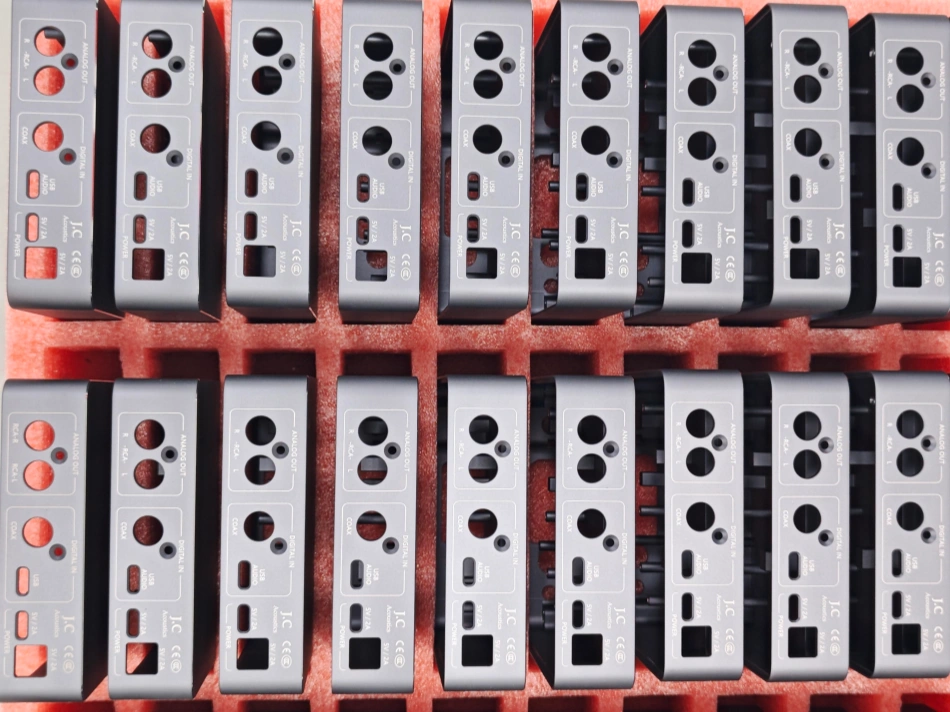
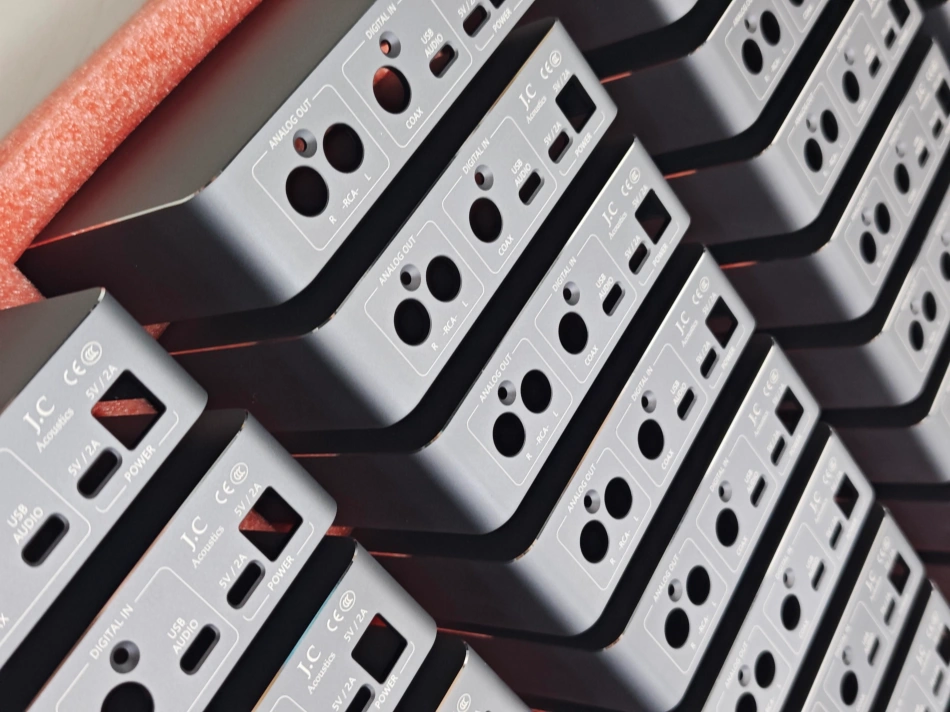
The completed audio electronics housings combine one-piece 6061 aluminum construction with a fine sandblasted, anodized finish and laser-marked graphics. The images below show the finished batch alongside the marking and internal machining details.
From Solid Aluminum to a Finished, Branded Housing
This project brings CNC cavity machining, multi-side features and decorative finishing together in a complete manufacturing route. The result is a custom metal enclosure prepared for the customer’s electronics assembly, with the external finish and product markings already applied.
- Material
- Aluminum 6061
- Construction
- CNC Milled from Solid Billet
- Surface Finish
- Fine Sandblasting + Anodizing
- Final Process
- Laser Marking
Need a Custom CNC Machined Electronics Enclosure?
Send us your STEP, STP, PDF or 2D drawing, together with the required quantity and surface finish. Our engineering team can review the enclosure geometry, assembly features, tolerances and marking requirements before preparing a quotation.